These files are responsible for the optimal functioning of many system applications and processes. As you use and personalize your computer, Windows creates more and more registry files, most of which aren’t deleted even when they are no longer needed. The Registry gets bloated with redundant files that eventually get damaged, corrupt, or broken. Factors like power failure, abrupt shutdown, faulty hardware, malware, and viruses can also corrupt some registry items. Consequently, broken registry items clog your PC’s storage, slow down your computer, and sometimes result in startup problems.
Do You Need to Fix Broken Registry Items
You should occasionally confirm that your Windows computer is devoid of broken items in the registry. Doing so will positively impact your PC’s performance, particularly if your computer is running slowly or if some system apps are not working correctly. The point is: You stand to benefit more from removing or fixing broken registry files than leaving them to bloat the registry. Windows has a number of built-in tools that can help diagnose issues with registry files. Proceed to the next section to learn how to use these tools to fix broken registry items on a Windows PC. Note: The Windows Registry is a database of sensitive files and settings. Therefore, it’s important to make a backup of the registry before you attempt to make changes to the registry or fix broken registry items. Damaging any registry file may corrupt the Windows OS and cause your computer to malfunction. Creating a backup serves as your insurance should anything go wrong. This guide on backing up and restoring the Windows Registry has everything you need to know.
1. Perform Disk Cleanup
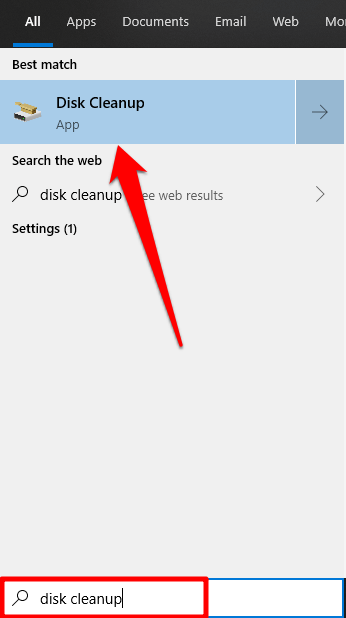
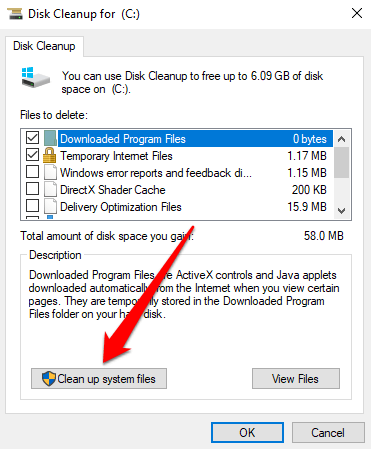
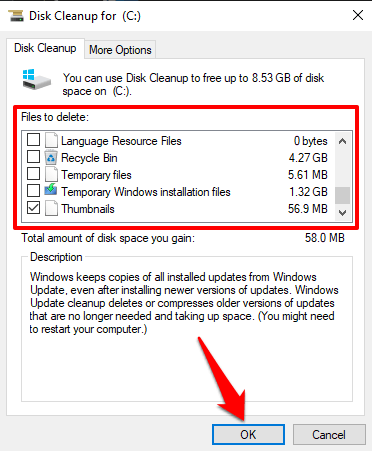
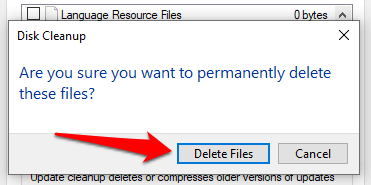
The Disk Cleanup tool that lets you remove unnecessary files from your computer, this includes broken registry items. To access this tool, type disk cleanup in the Windows Search box and click Disk Cleanup in the results. Click the Clean up system files button. You can check other file options in the “Files to delete” window. These are redundant temporary files that your computer can do without. You can click on a file type and check the Description section to learn more about the file and what it does. Click OK when you’re done with file selection. Click Delete File on the confirmation prompt and Windows will permanently delete corrupt registry files and other selected files.
2. Use the System File Checker
The System File Checker (SFC) is another important tool integrated into the Windows operating system. This tool fixes broken registry files using a “repair-or-replace” approach. It scans your computer for corrupt or missing system files. If the tool finds any, it replaces them with a fresh copy. The tool is accessible via the Command Prompt; here’s how to use it:
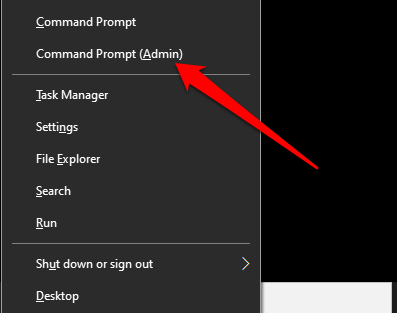
- Right-click on the Start Menu or Windows icon and select Command Prompt (Admin) from the Quick Access menu.
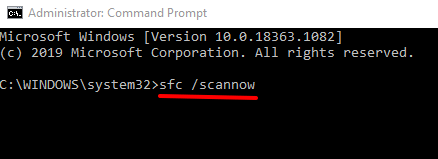
- Type or paste sfc /scannow and press Enter. When the SFC utility executes the command (P.S: this might take up to 30 minutes), it’ll let you know if it found or repaired any corrupt files. This makes the utility a good way to confirm if your computer has any broken registry item. Note: If you get a message that reads “Windows Resource Protection found corrupt files but was unable to fix some of them,” run the SFC command again. If this continues, restart your computer and try again.
3. Run the DISM Tool
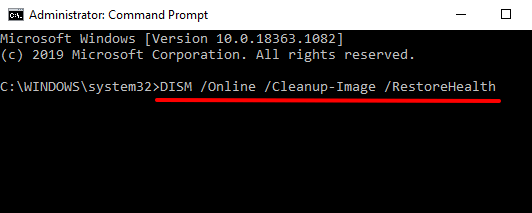
You can also use the Deployment Image Servicing and Management (DISM) command to repair broken registry files, particularly if the System File Checker doesn’t find or fix any broken registry file. Right-click the Start Menu button and select Command Prompt (Admin). Type or paste DISM /Online /Cleanup-Image /RestoreHealth into the console and press Enter on the keyboard. That will prompt the DISM tool to scan your computer for corrupt and broken system files; check the results to confirm if any file was replaced.
4. Repair Install Windows
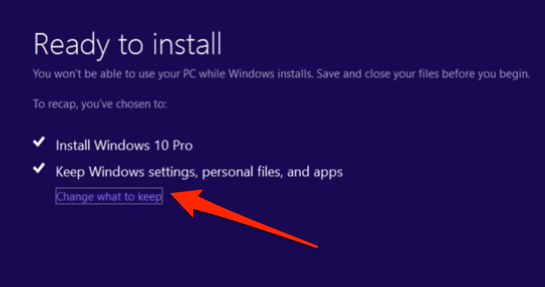
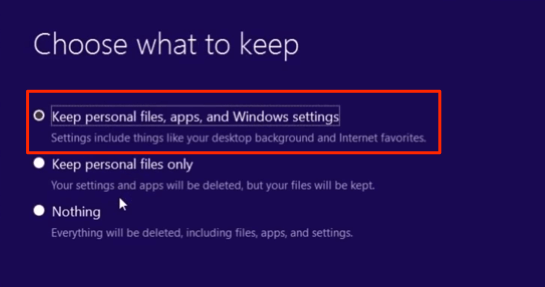
Another way to fix or replace broken registry items is to reinstall Windows from scratch while preserving your personal files, installed applications, and other system settings. This is known as a repair install (or repair upgrade). You’d need to download the Windows 10 Disc Image (ISO file) from Microsoft’s website. Double-click the disc image file to commend the repair installation process. Follow the installation prompts and agree to the necessary license/usage terms. On the “Ready to install” page, make sure an option that reads “Keep Windows settings, personal files and apps” is on the screen. Otherwise, click Change what to keep and select Keep personal files, apps, and Windows settings. When the installation is complete, your PC will be free of corrupt or broken registry files.
5. Run Automated Repair
The Automated Repair utility is great for foxing startup-related issues on Windows 10 computers. The tool is also equipped to scan and fix problems affecting registry settings as well as other system files and configurations.
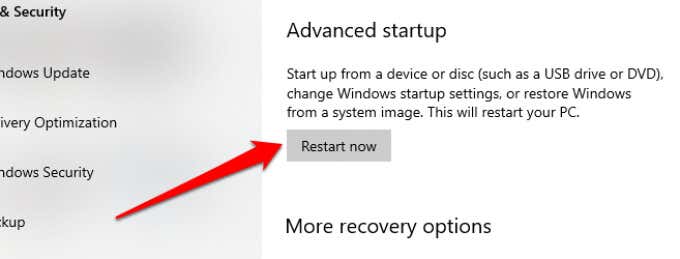
- To access the Automated Repair tool, go to Settings > Updates & Security > Recovery and click Restart now in the “Advanced startup” section. That will reboot your PC into the Advanced Startup Options menu.
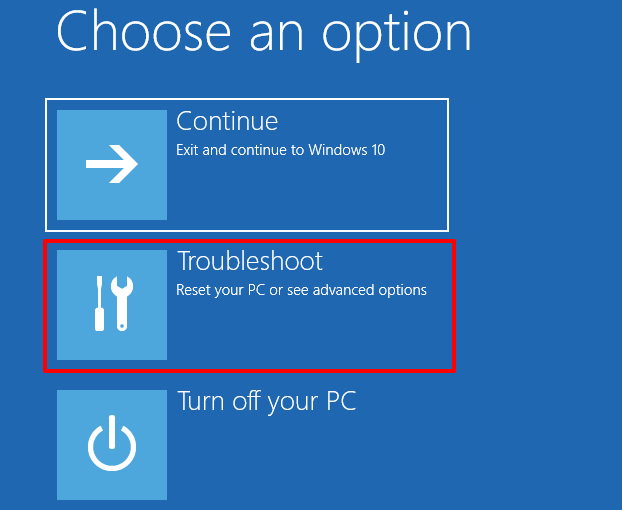
- Select Troubleshoot to proceed.
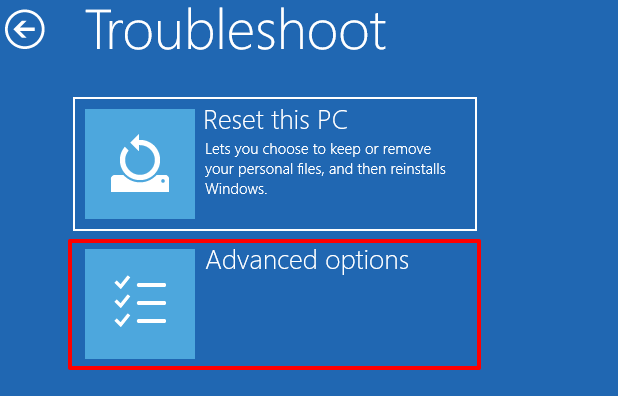
- Click Advanced options.
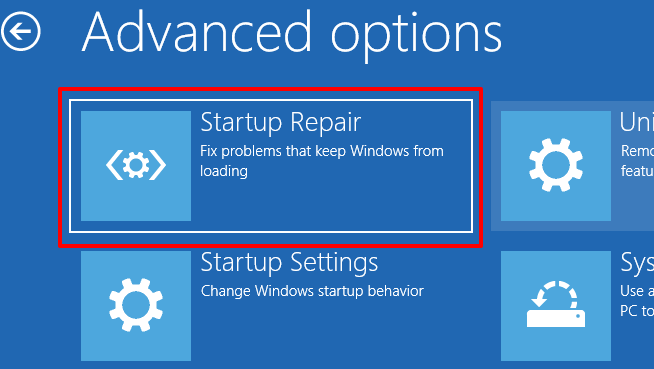
- Choose Startup Repair from the list of Advanced options.
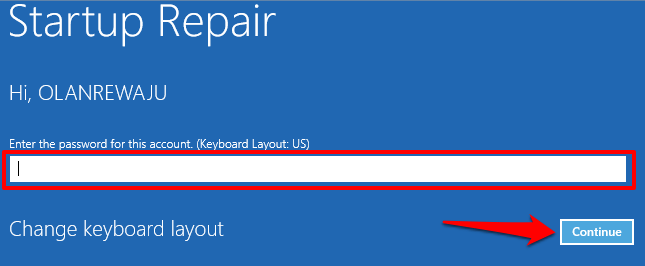
- Choose your account and enter the profile password to continue. If the account isn’t password-protected, simply click Continue to proceed. The Automatic (Startup) Repair tool will scan your computer and fix any broken registry file it finds.
6. Use a Registry Scanner
You can also utilize a third-party registry scanner (also called registry optimizers or registry cleaners) to fix broken registry items on your Windows computer. The software will put your PC’s registry back in shape, removing and replacing corrupt and missing files. Malwarebytes is a trusted and reliable registry cleaning program you can use to fix broken registry items. The problem with these registry cleaners is that they sometimes don’t always fix or replace registry files. A malicious registry scanner may even ruin your PC’s registry. Make sure you read enough reviews before installing a third-party registry scanning tool.
Healthy Registry, Healthy PC
In addition to the solutions highlighted above, you can also fix broken registry items in Windows by reverting your PC to a restore point where registry items were not broken. Another option is to reset your computer (go to Settings > Updates & Security > Recovery > Reset this PC). Performing a reset will delete all installed applications and system settings (but keep your personal files). So you should only reset your PC as a last resort. Finally, make sure you scan your PC for malware and viruses causing registry items to become broken or damaged.

